A ZPL converter is useful for more than turning Zebra Programming Language into a PDF. For developers, it is a fast way to inspect the output of an application before a label reaches a warehouse printer, carrier audit, or customer.
The reliable workflow is simple:
- Render the ZPL at the target label size and printer density.
- Inspect text, graphics, positioning, and barcode data.
- Test the output against the printer and media you actually use.
- Automate the same preview and validation step through an API when labels are generated at scale.
This guide explains how to do that without treating a browser preview as proof that every production label is correct.
What does a ZPL converter do?
ZPL is a command language. Your application sends commands that tell a Zebra printer where to draw text, barcodes, graphics, and lines. A ZPL converter renders those commands into another format, such as PDF or PNG, so you can see the result without sending the job to a printer.
That makes conversion useful for three common jobs:
- Debugging: find a misplaced field or clipped barcode while you are still developing.
- Documentation and support: generate a visual copy of a label for a ticket, approval, or archive.
- Automation: create previews or converted output from a WMS, ERP, shipping platform, or SaaS product.
The output format depends on the job. PDF is usually the better choice for sharing and archiving because it stays crisp when enlarged. PNG is convenient for a web preview, documentation page, or support ticket. Native ZPL remains the right output when the destination is a Zebra thermal printer.
You can use LabelZoom’s ZPL converter for browser-based previews, or call the ZPL-to-PDF API endpoint from your backend.
Why a browser preview can differ from a printed label
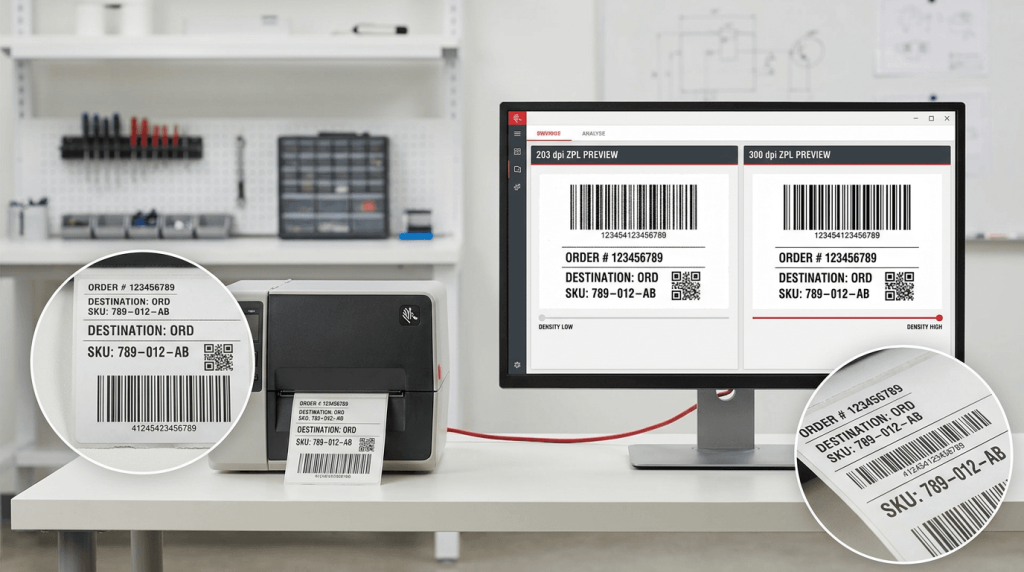
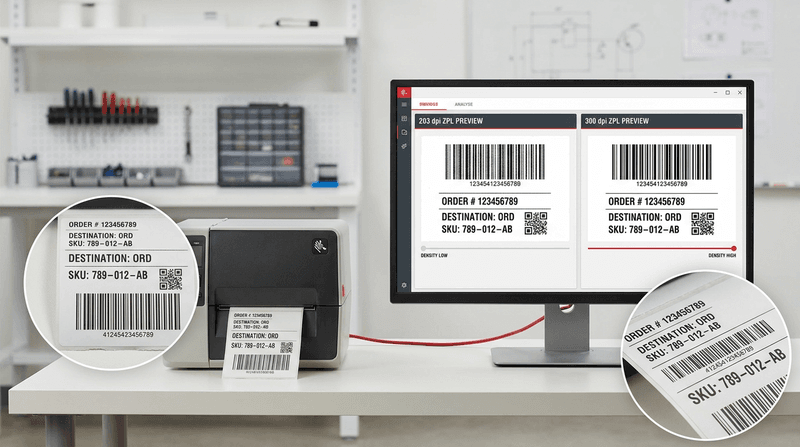
A label is positioned in printer dots, not in abstract CSS pixels. The printer density determines how many dots fit into an inch, so the same coordinates can produce a different physical result on a 203 dpi printer and a 300 dpi printer.
Zebra’s documentation describes common printhead densities including 6, 8, and 12 dots per millimeter, which correspond roughly to 152, 203, and 300 dpi. The ZPL programming guide also documents how density settings affect the scale of a format. See the official ZPL programming guide when you need to confirm how a command behaves on a specific printer family.
In practice, a preview can look correct while production output fails because:
- The preview uses the wrong dpi or dpmm setting.
- The label width or height does not match the loaded media.
- A barcode is too small for the scanner or print process.
- A font is unavailable, substituted, or scaled differently.
- Print speed, darkness, ribbon, or media quality changes the result.
- The application generated valid-looking ZPL with the wrong variable data.
A converter helps you catch layout problems. It does not remove the need to test a real printer, real media, and real barcode data.
How to preview ZPL at the correct density
Use this sequence whenever you receive a new ZPL template or change an existing one.
1. Identify the target printer
Record the printer model, printhead density, label dimensions, and media type. If you are supporting several models, keep those combinations as explicit test cases instead of assuming that one preview covers every device.
For example:
| Printer profile | Density | Typical use |
|---|---|---|
| Legacy thermal printer | 6 dpmm / 152 dpi | Older or lower-resolution equipment |
| Standard desktop or industrial Zebra | 8 dpmm / 203 dpi | Common shipping and warehouse labels |
| Fine-print Zebra model | 12 dpmm / 300 dpi | Smaller text or higher-resolution output |
| High-resolution industrial printer | 24 dpmm / 600 dpi | Specialized, high-detail labels |
2. Render the label
Paste the ZPL into a viewer or submit it to a converter. Set the label width, height, and density to match the target printer. Do not leave those values at a convenient default if the output is headed to production.
For a quick browser check, use the ZPL to PDF converter. For an application workflow, the API accepts raw ZPL and returns the converted output.
A minimal JavaScript request looks like this:
const zpl = "^XA^FO50,50^A0N,40,40^FDOrder 12345^FS^XZ";

const response = await fetch(
  "https://api.labelzoom.com/api/v2/convert/zpl/to/pdf?label.width=4&label.height=6&dpi=203",
  {
    method: "POST",
    headers: {
      "Content-Type": "text/plain",
      Authorization: `Bearer ${process.env.LABELZOOM_API_KEY}`,
    },
    body: zpl,
  },
);

if (!response.ok) {
  throw new Error(`Conversion failed: ${response.status}`);
}

const pdf = Buffer.from(await response.arrayBuffer());
Keep the API key on your backend. Do not expose it in browser code. The LabelZoom JavaScript quickstart covers the same request pattern and includes PDF-to-ZPL examples.
3. Check the edges and variable fields
Look at the four edges first. Clipping at the right or bottom edge usually means the label dimensions, origin, or scaling does not match the physical media.
Then inspect the fields that change from label to label:
- Order numbers and tracking numbers
- Product descriptions and quantities
- Addresses and long customer names
- Dates, lot numbers, and serial numbers
- Human-readable text below barcodes
- Optional fields that appear only for certain orders
A template that works with short sample values can fail when a real address wraps to a second line. Test the longest realistic values, not only the neatest example.
How to validate barcodes before production
A barcode can look acceptable and still be wrong. Validate both the encoded payload and the printed symbol.
First, compare the value in the source data with the human-readable value on the rendered label. Then decode the barcode from the rendered output with the same type of scanner or decoding process used downstream.
Pay attention to:
- Symbol type and application identifier
- Check digits
- Bar height and width
- Quiet zones around the symbol
- Contrast between bars and background
- Rotation and placement
- Print darkness and speed
GS1’s barcode quality guidance specifically calls out quiet zones, contrast, construction, symbol size, bar height, and positioning. Those checks are useful even when your label is not part of a formal GS1 workflow.
LabelZoom’s rendering workflow adds a useful engineering check: barcode output can be verified by decoding the rendered symbol rather than only comparing pixels. That matters because a barcode that scans cleanly but contains the wrong payload is harder to detect than a visibly broken barcode.
When to use PDF, PNG, or ZPL output
Choose the output based on the next system in the workflow.
| Output | Best for | Main trade-off |
|---|---|---|
| Sharing, approval, archiving, office printing | Not the printer’s native command language | |
| PNG | Browser previews, documentation, support tickets | Raster output is less suitable for scaling and production printing |
| ZPL | Native Zebra printing and automated thermal workflows | Requires a compatible printer and correct density settings |
| JSON or structured data | Application logic and downstream processing | Availability and behavior depend on the conversion path |
How to automate ZPL preview and validation
A developer workflow usually starts with a single label and grows into a batch process. Build the validation step before volume makes failures expensive.
A practical pipeline looks like this:
- Generate the label from a known template and test data.
- Render it at each supported printer density.
- Check dimensions and field boundaries.
- Decode every barcode and compare the payload with the source data.
- Store a preview or test result for failed cases.
- Send only validated output to the print queue.
For multiple labels, pass variable data into the conversion request rather than concatenating untested strings into the ZPL. LabelZoom’s conversion parameter reference documents data filling and multi-label output.
If the workflow sends labels directly to printers, make retries safe. A network timeout does not always tell you whether the printer received the job. An idempotency key or an equivalent job identifier can prevent an automatic retry from producing duplicate labels. LabelZoom’s cloud print API documentation describes idempotent print requests and native printer output, while noting that cloud printing is currently a beta feature.
Common ZPL converter mistakes
Using the default density
A preview at 203 dpi is not a universal substitute for testing a 300 dpi printer. Store density with the printer profile and make it part of the request.
Treating a PDF as proof of print quality
PDF output confirms layout, not every physical printing variable. Test darkness, speed, media, and scanner performance on the real device.
Converting to an image too early
Rasterizing a label can simplify compatibility, but it may increase payload size and reduce the printer’s ability to render native elements efficiently. Use image output for previews when appropriate, not automatically for every production path.
Testing only static labels
Variable data is where many failures appear. Include long addresses, unusual characters, maximum quantities, empty optional fields, and the longest barcode values in your test set.
Putting API credentials in frontend code
The browser is the wrong place for a production API secret. Send conversion requests from your server and return only the output or preview your application needs.
A reliable starting point
Use a browser-based ZPL converter to understand the label quickly. Match the preview to the target printer’s density and media. Check variable fields and decode the barcodes. Then move the same workflow into the LabelZoom REST API when your application needs repeatable conversion, previews, or batch processing.
The important distinction is between seeing a label and knowing it is ready to print. A good ZPL workflow does both: it renders the output clearly, then validates the details that can stop a warehouse line or create a failed scan.